Editing the Familex Document
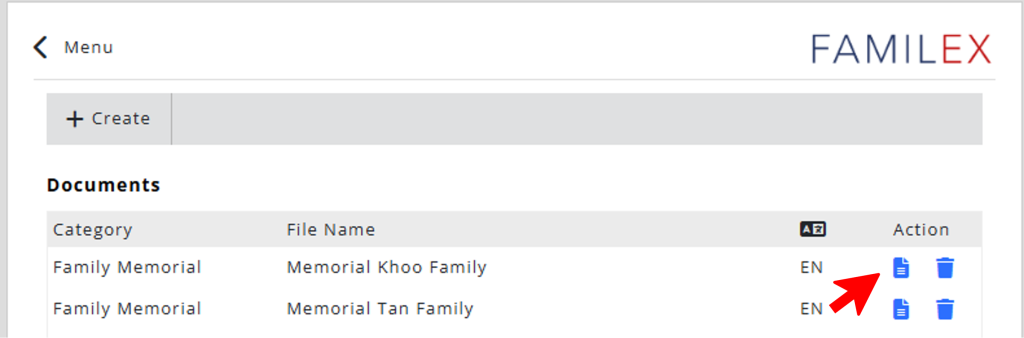
Select and Open the Document
First, select and open the Familex document.
Notes and Guides
If you are using Familex templates, there are notes and guides throughout the document to explain the format and what you can do for each section.
Feel free to delete these notes and guides later on, once you are comfortable with the template.
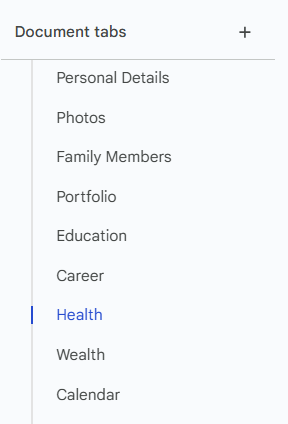
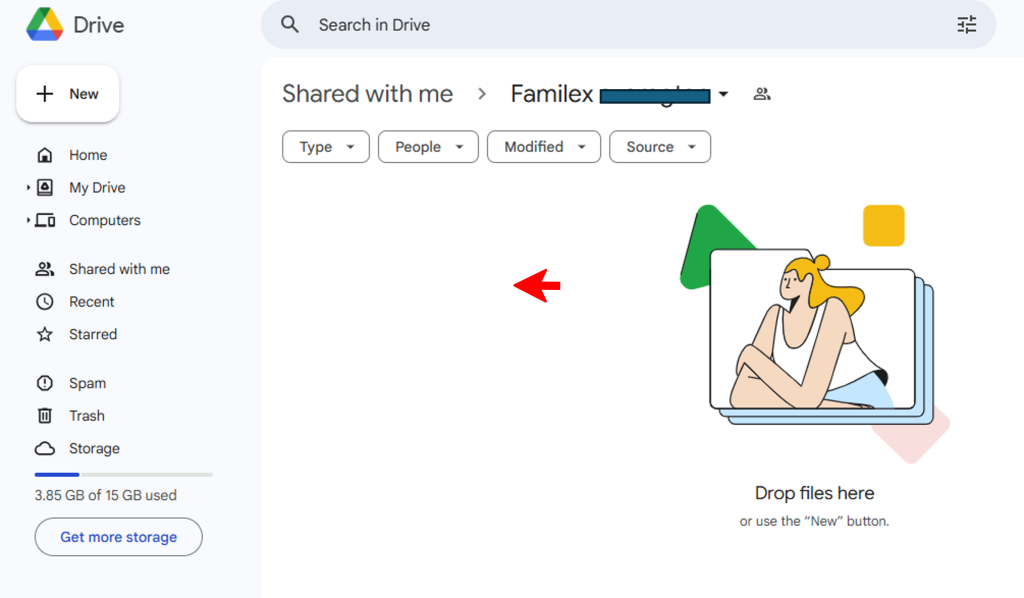
Navigating the Familex Registry
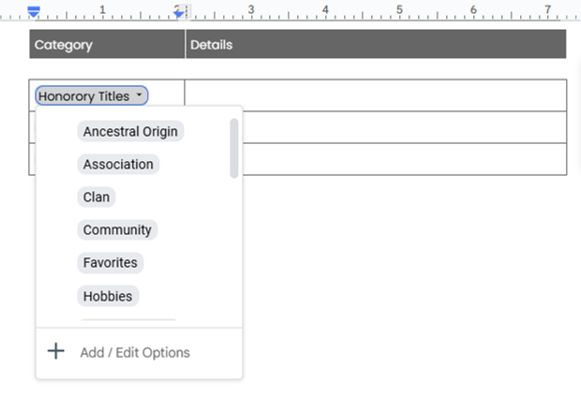
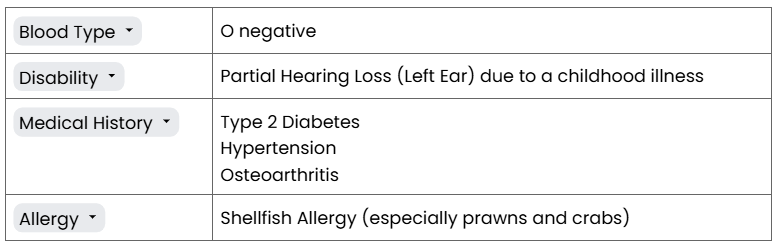
The Familex Registry template is made up of 15 sections. You can use the tabs/quick links to browse and navigate to each section.
Using Dropdowns
Dropdowns are used to guide data entry category. Each section has different sets of dropdowns.
You don’t have to select options that are not relevant to you.
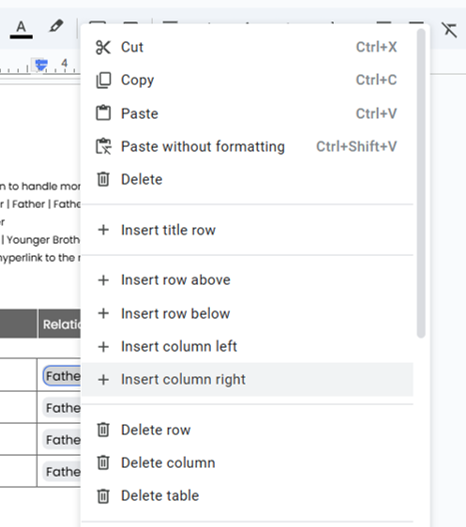
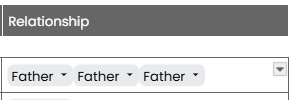
Duplicate (Copy/Paste) Dropdowns
Sometimes, you may need to duplicate a dropdown menu, for example under the Family Member section.
You can copy/paste dropdown menus easily by using Ctrl+C / Ctrl+V or right click + copy or paste.
This is very useful to illustrate complex family relationship (especially for Chinese families), for example your Paternal Great Grandfather is Father > Father > Father.
How about your Maternal 2nd Grandaunty’s Husband?
Mother > Mother > 2nd sister > Husband
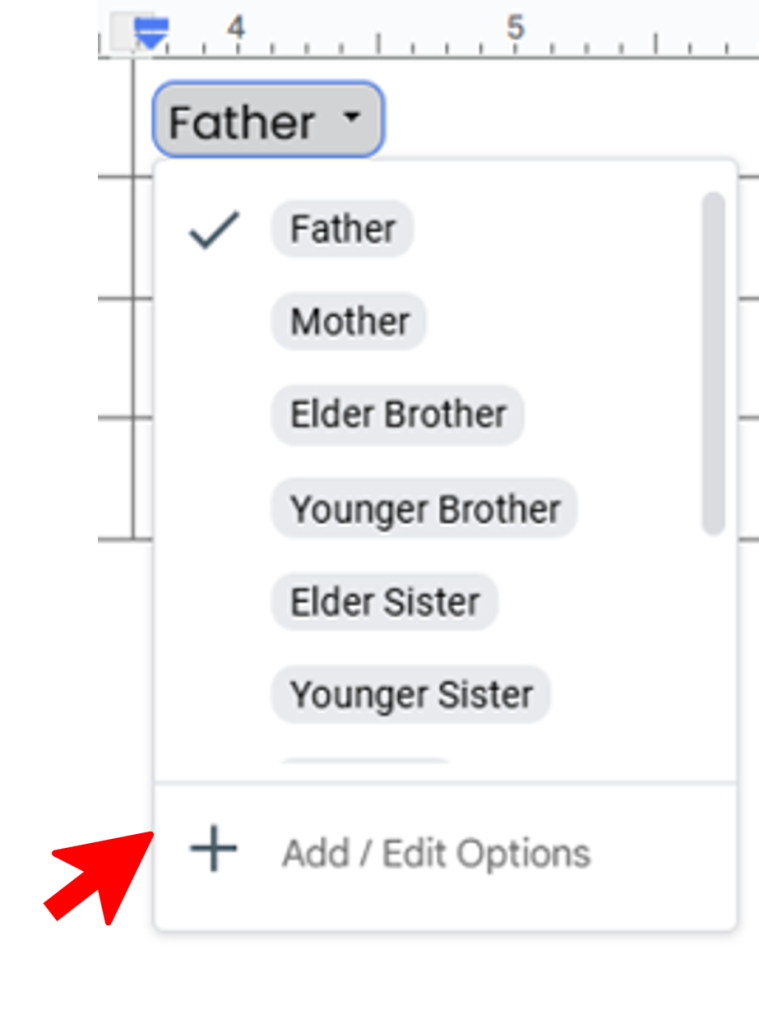
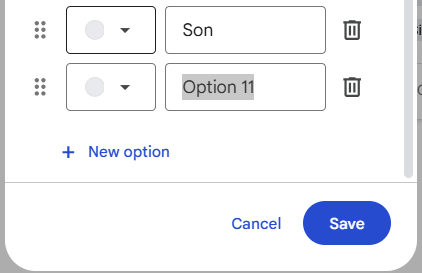
Editing / Customizing Dropdowns
If you couldn’t find a suitable option in the dropdowns, you can easily Edit an existing option or Add a new one.
To Edit, type over an existing option.
To Add, click New option and type in.
To Delete, click the Trash can button.
Entering Text Information
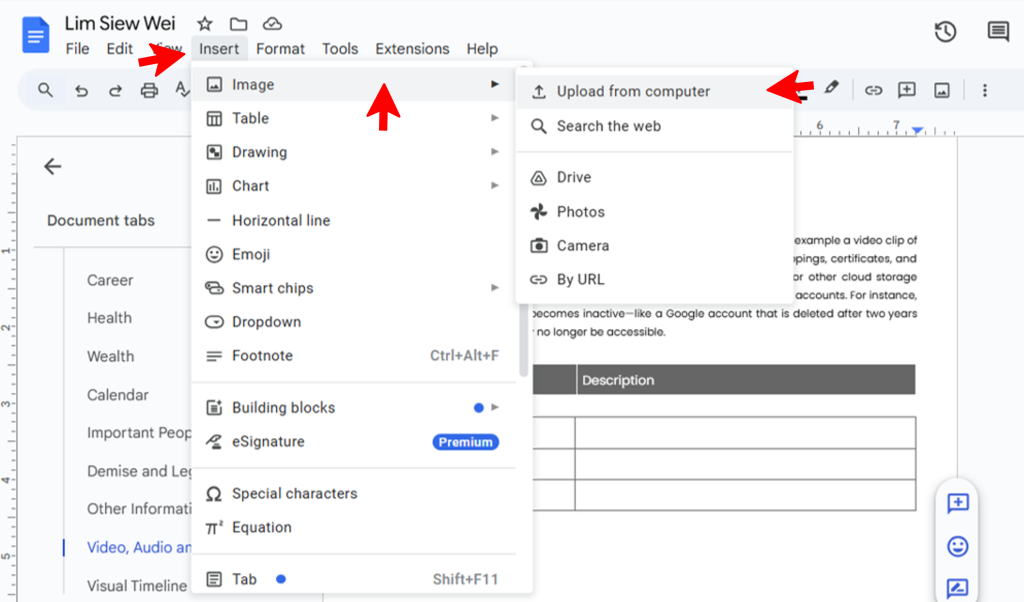
To enter text information, simply click the dropdown menu, select options related to the section and person, then enter the information accordingly.
Inserting Photos
You can directly upload images into the document from your computer or smart devices.
From the menu, go to Insert > Image > Upload from computer.
Images uploaded will be embedded within the document.
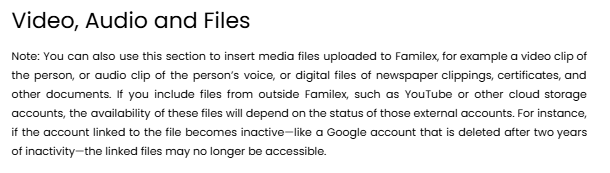
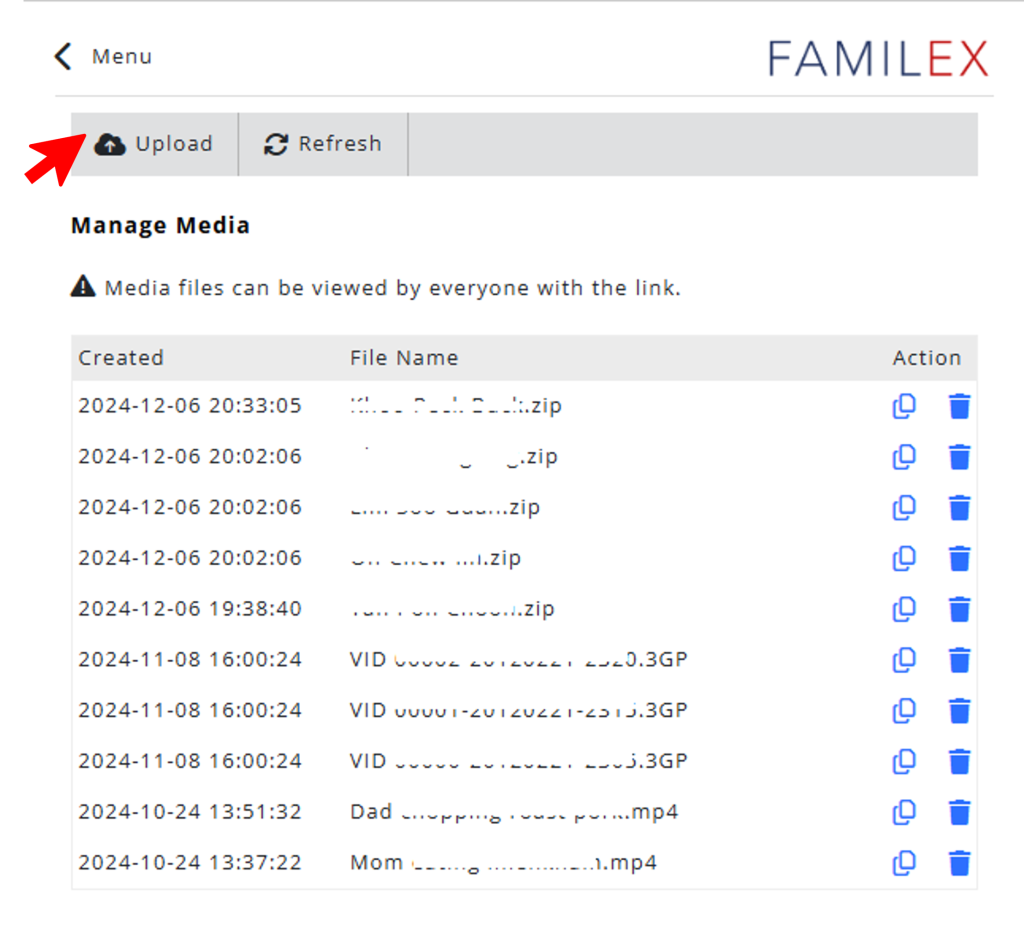
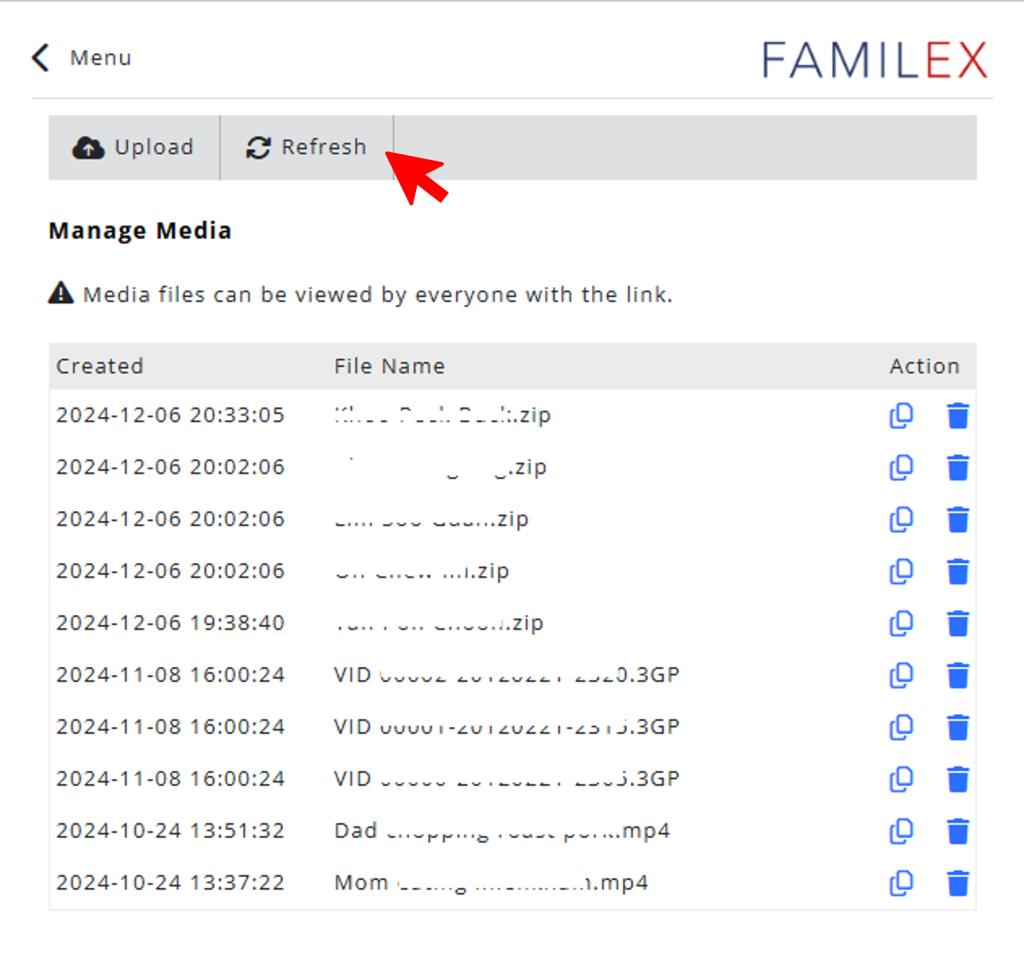
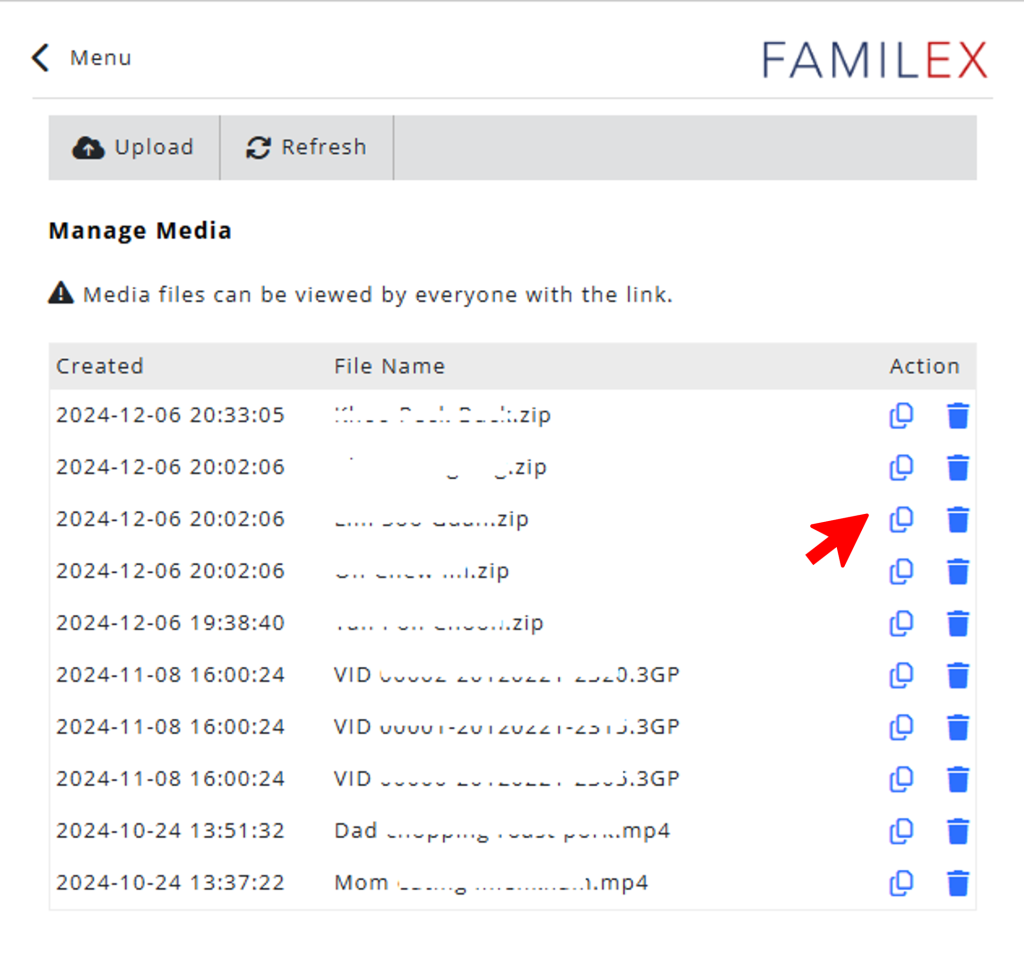
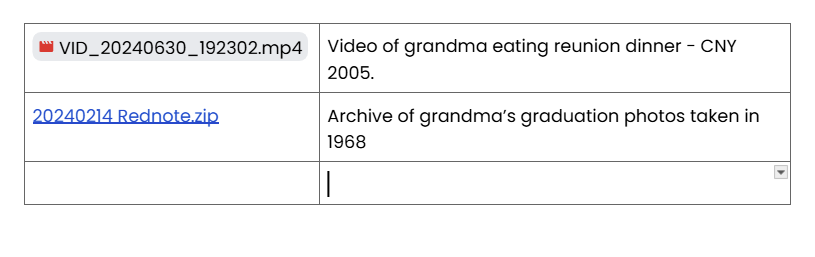
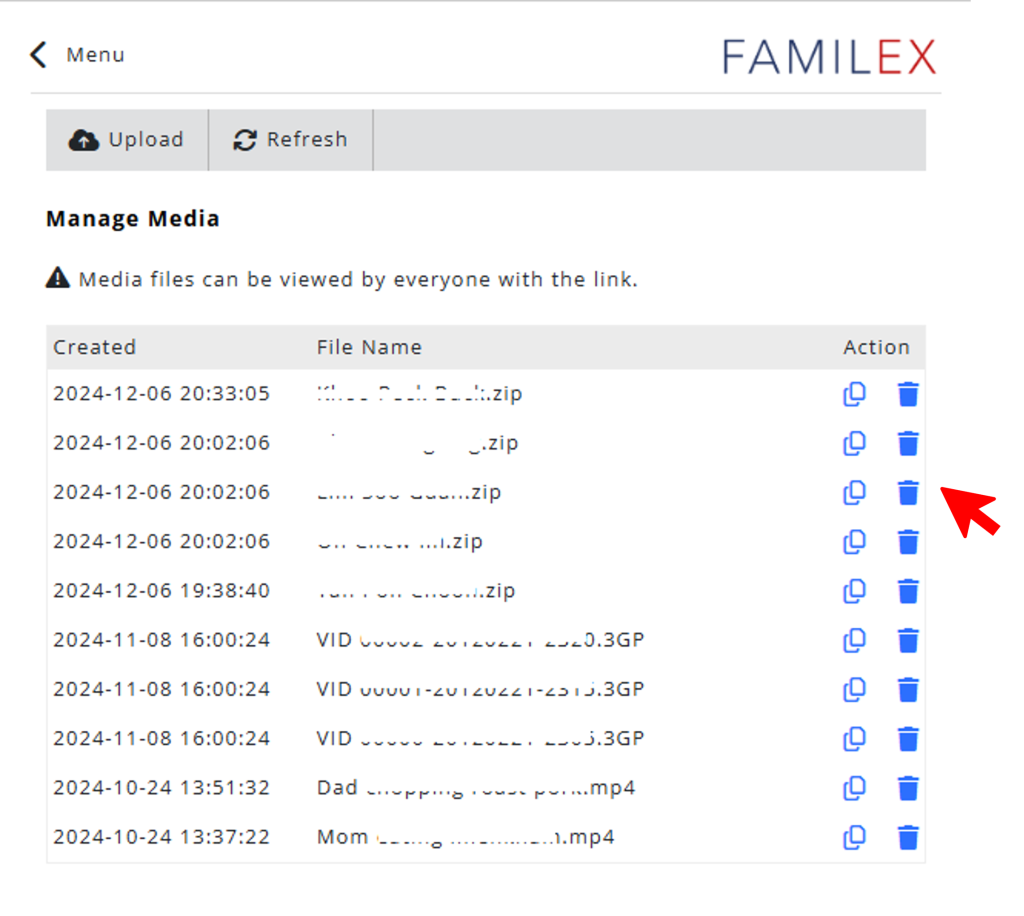
Inserting Videos, Audios or Other Formats
You CANNOT directly embed videos, audios or other file formats (zip, pdf) into the document. Please first upload these files to Familex using the Media feature.
Click Upload to upload your media files to Familex.
Make sure you are logged in to your Google account that you used to register for Rednote.
A Google Drive upload screen will appear. Drag and drop your media files to upload.
After sucessful upload, close the screen and return to User Portal Dashboard.
Click the Refresh button so that Rednote/Familex will move your recently uploaded media files to a secured storage location.
This may take some time to complete, depending on number of files and their sizes.
Once complete, your recently uploaded media files will appear in the table.
Click on the Copy Link button to copy the file URL to clipboard.
At the document, past the link at the location that you want the media file to appear. Repeat for all media files.
If you have uploaded the wrong media file, you can delete them using the Trash Can button.
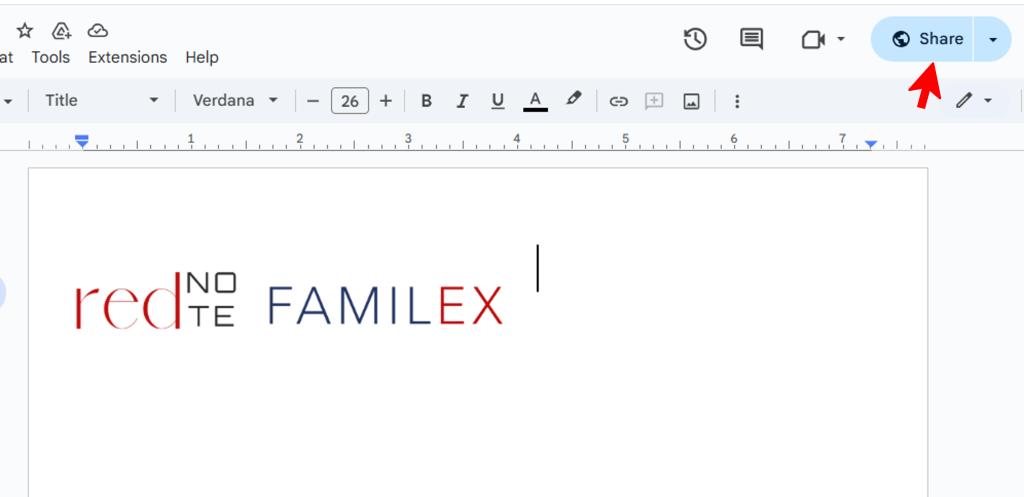
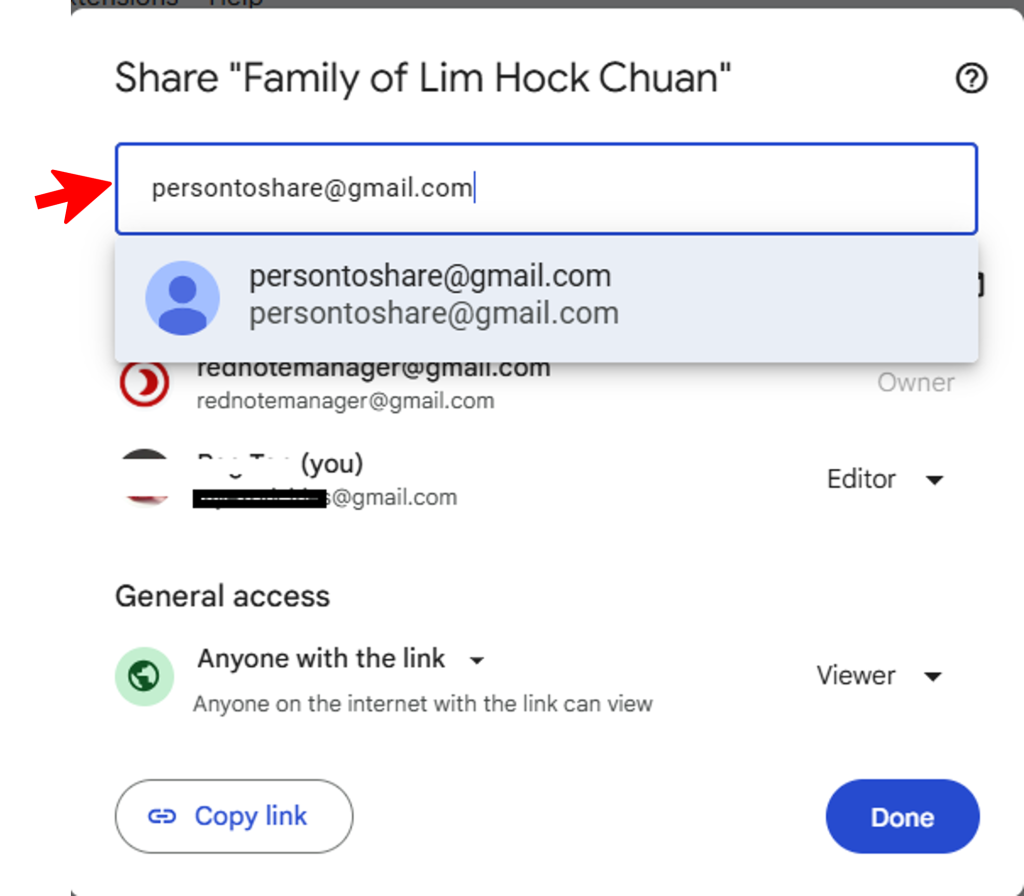
Sharing the Document / Collaborate
You can share a Familex document to:
- Allow others to view
- Allow others to collaborate and edit the document
The Share-To party must have a valid Gmail account in order to Edit the document.
You can also set an expiration date for temporary permissions.
Open the document and click the Share button.
Enter the Gmail address of the Share-To Party.
Click Notify Party if you want Google to notify the sharing to the Share-To Party.
Once shared, the Share-To Party can view the file in their Google Drive too!
Select the correct sharing permission:
- Viewer: Can view the document without the ability comment or edit.
- Commenter: Can view and comment, for example suggest an edit.
- Editor: Can fully edit and delete the entire document content.
Important
To allow someone to “inherit” the document, remember to share with Editor permission.
This is important so that even when the document creator is no longer around, those with Editor permission can continue to manage the document.
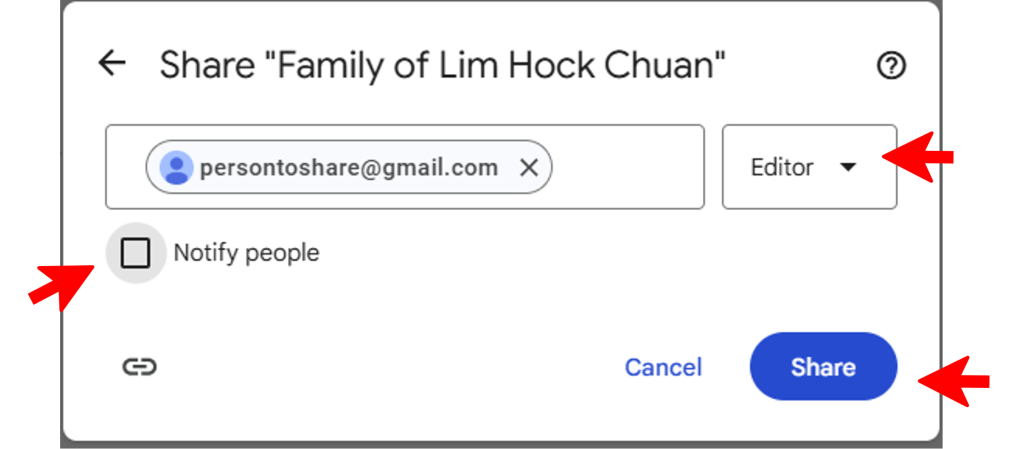
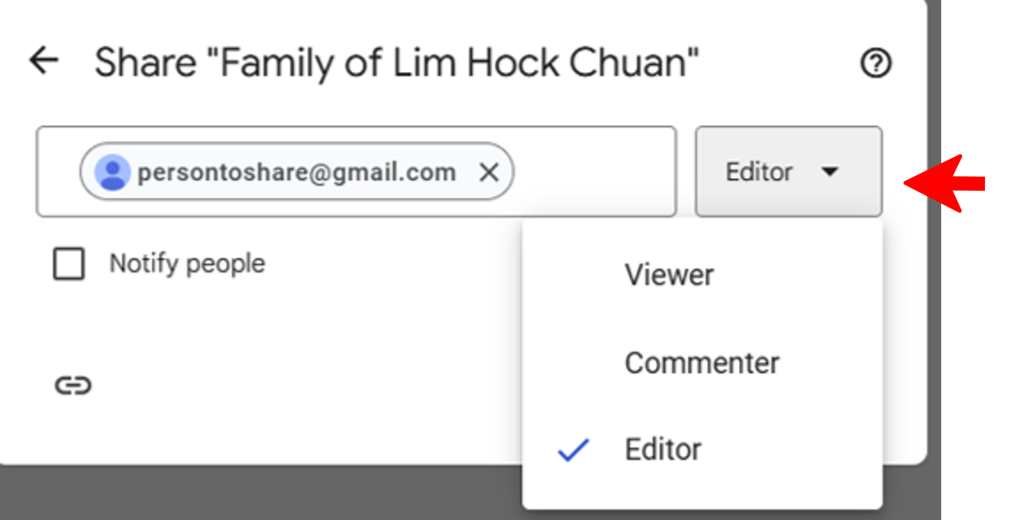
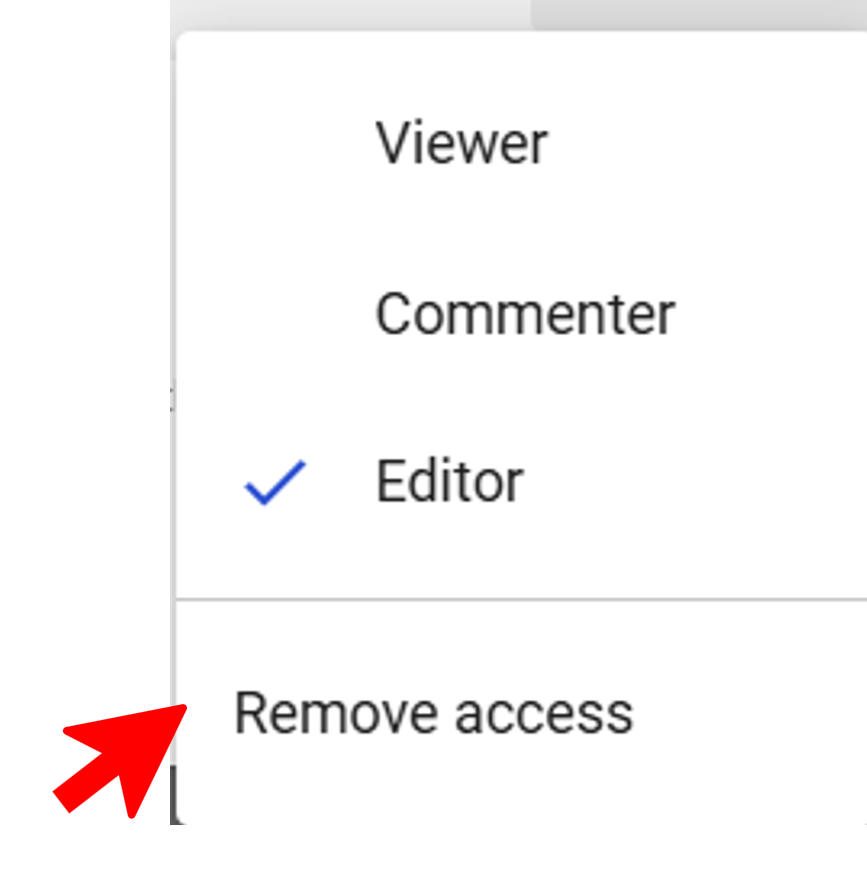
Editing and Remove Sharing
You can easily revoke sharing.
Open the document, click on Share.
Select the Gmail to remove, click on Permission and select Remove access.
You can also change permission type using this method.
